
The spring post-winter inspection in Ahuntsic is a critical step that too many homeowners put off — a mistake that can turn a harmless crack into an entry corridor for rodents, carpenter ants and other pests. As soon as temperatures climb back above zero, foundations, roofs and eaves come out weakened by freeze-thaw cycles. Act fast. Early action changes everything.
Ahuntsic has a dense mix of housing: 1940s–1960s triplexes on Fleury Street, bungalows near Ahuntsic Park and recent condos around Henri-Bourassa Boulevard. Each type of building has its own weak points in spring. The first heavy spring rains often bring out carpenter ants and field mice, a sign that winter gaps have not yet been sealed. This complete checklist guides you room by room, from the foundation footing to the roof ridge.
- Foundations first: stair-step cracks in concrete blocks or brick are the preferred entry points for rodents and carpenter ants as soon as the thaw begins.
- Roof and eaves: damaged soffits, lifted shingles and damp wood attract wasps and carpenter ants, which settle in before mid-May.
- Tight timeline: the ideal inspection takes place between mid-March and the end of April, before carpenter ants swarm and rodents nest in spring.
- Signs not to ignore: frass (fine sawdust mixed with insect debris), tunnels in insulation, musky odours in the unfinished basement.
- Integrated prevention: sealing, cutting branches within 60 cm of the roof and eliminating sources of moisture measurably reduce the risk of a summer infestation.
Which parts of the foundation and basement should you inspect first after winter?
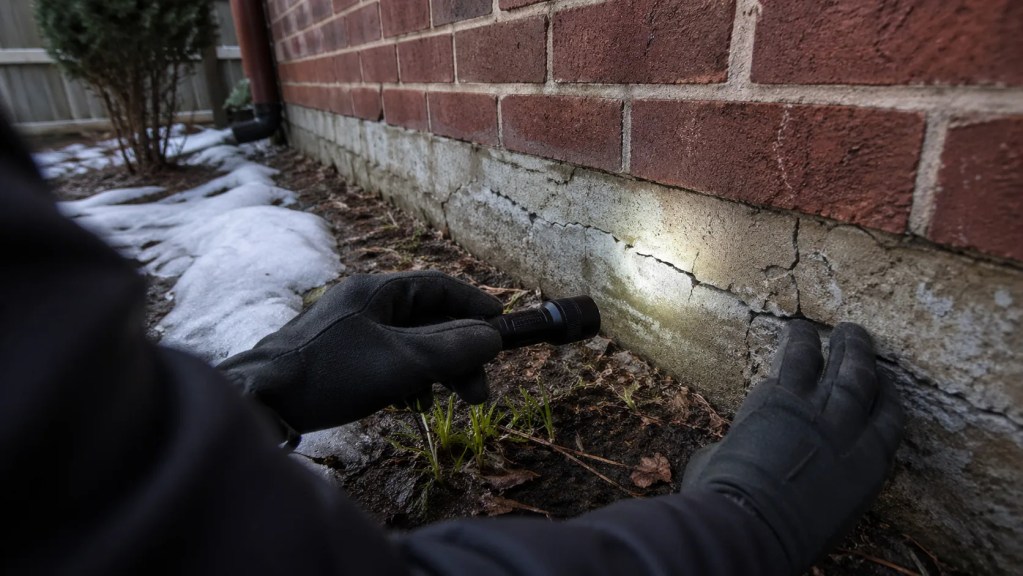
The foundation is the first perimeter to inspect after winter, because repeated freeze-thaw cycles crack the mortar, push concrete blocks apart and create 6 mm openings — enough for an adult mouse to get in. Walk the entire exterior perimeter at ground level, then inspect the unfinished basement from the inside, flashlight in hand.
Look for stair-step cracks in the masonry, eroded mortar joints, holes around plumbing pipes and partially blocked foundation drains. Ahuntsic's oldest buildings sometimes have fieldstone foundations: lime mortar wears faster than modern concrete, which multiplies potential weak spots.
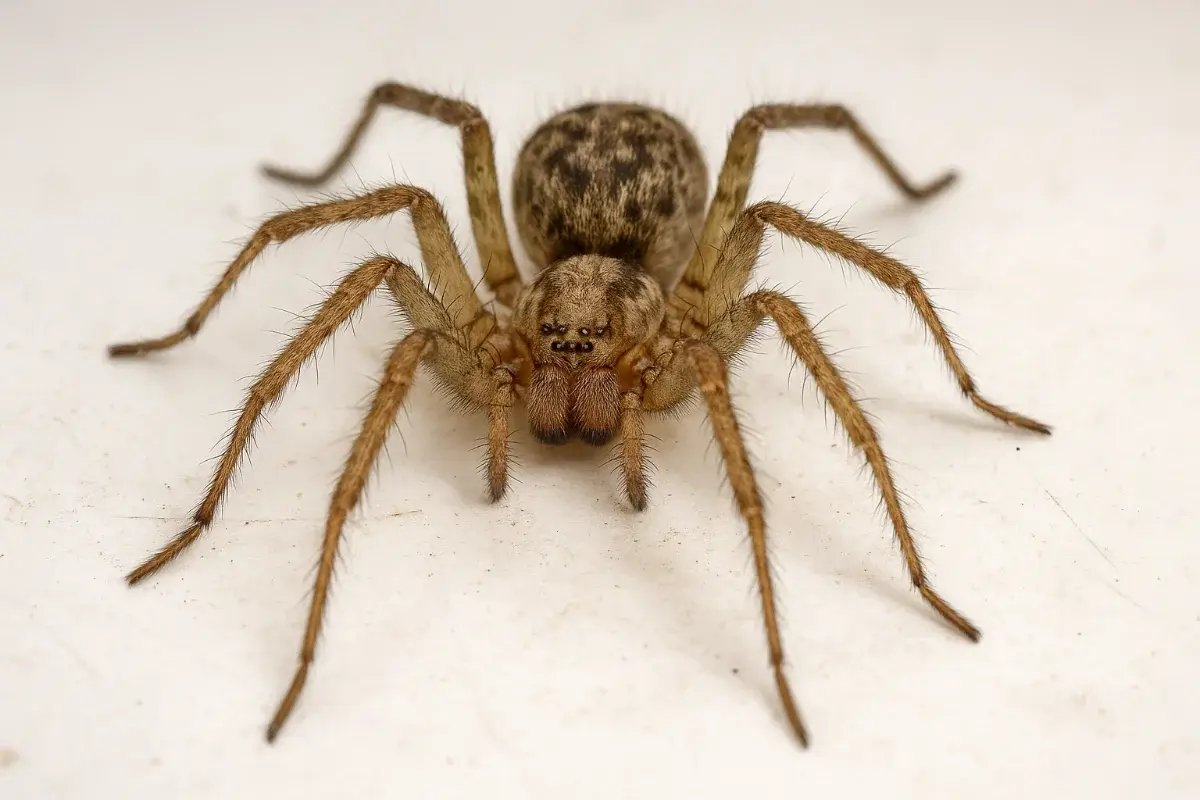
Inside, look at the insulation around the walls: the presence of frass — compacted sawdust mixed with insect fragments — indicates carpenter ant galleries (Camponotus pennsylvanicus). A persistent musky odour instead points to regular rodent traffic. Also check the mineral wool around ducts: deer mice (Peromyscus maniculatus) shred it to build their winter nests. In duplexes, tunnels dug into polystyrene insulation often lead back to a simple foundation crack only a few millimetres wide.
Seal immediately with expanding foam reinforced with steel wool (grade 00) for small holes, and with hydraulic mortar for cracks in concrete. Do not leave a temporary repair in place for more than two weeks: rodents quickly gnaw through plain foam.
How do you inspect the roof and eaves to detect spring intrusions?
After the foundation, the roof and eaves are the most vulnerable areas: cracked vinyl soffits, asphalt shingles lifted by frost and loose flashing joints give pests direct access to the attic or the spaces between walls. A visual inspection from the ground with binoculars, followed by a check on the roof, is enough in most cases.
From the ground, look for soffits that are bulging, punctured or have ventilation slots blocked by leaves or a nest. Also look at the flashing around chimneys: loose flashing lets in water and carpenter ants at the same time.
When you go up on the roof (safety is mandatory: harness, non-slip shoes, never work alone), check every shingle for lifting. Also check the roof edges for ice damming that lingers: edge ice keeps the roof framing damp for weeks after the thaw, speeding up rot and ant infestation.
Trim all tree branches within 60 cm of the roof. Along Gouin Boulevard, large mature maples often reach over the roofs — a direct path to the roof for carpenter ants. Block ventilation openings with galvanized metal mesh (6 mm openings maximum).
| Inspected area | Sign of intrusion / damage | Likely pest | Priority action |
|---|---|---|---|
| Foundation (exterior) | Stair-step crack, eroded mortar | Mice, Norway rat | Foam + steel wool or hydraulic mortar |
| Unfinished basement | Frass, shredded insulation, musky odour | Carpenter ant, deer mouse | Professional inspection, registered slow-acting bait |
| Roof (shingles) | Lifted shingle, loose flashing | Carpenter ant, wasp | Re-nail / replace + flashing caulking |
| Around windows / doors | Worn weatherstripping, cracked silicone | Mice, German cockroach | Weatherstripping replacement, exterior silicone |
When do carpenter ants start swarming in Ahuntsic, and how can you stop them?
Carpenter ants (Camponotus pennsylvanicus) swarm in Ahuntsic typically between late April and mid-June. Swarming can be recognized by the sudden appearance of winged ants indoors — often near a window or a ceiling light — signalling a parent colony that has been established in the building’s structure for at least three to five years.
Damp wood is the essential condition: these insects do not eat wood, they excavate it to nest. Roof sheathing soaked after a harsh winter, a floor joist in contact with the soil of the unfinished basement, or a window frame with peeling paint — all are open invitations. According to Health Canada, carpenter ants live in large colonies and are well known for their ability to damage wooden structures.
An effective approach follows these steps:
- Locate the satellite colony or colonies by looking for frass (small piles of granular sawdust) at the base of walls, under windows and in basement corners.
- Fix the moisture source before any treatment — otherwise, the colony moves but does not disappear.
- Have a certified exterminator apply a slow-acting transfer bait (a registered bait gel) in the identified galleries.
- Inspect again in 4–6 weeks to confirm there is no new activity.
- Seal the entry points permanently once the colony is confirmed inactive.
Why is the area around windows and doors a critical zone in spring?
The area around windows and doors combines several risk factors at once in spring: exterior silicone cracks under winter temperature swings, weatherstripping sags, and wooden framing absorbs moisture from the thaw. This combination creates micro-passages that house mice (Mus musculus) and German cockroaches (Blattella germanica) exploit as early as the first mild nights of March.
In rental buildings around Sauvé Street or near the Marché Central, shared entrance doors accumulate damage: worn bottom weatherstripping, poorly sealed glazing, a slightly raised metal threshold. These details seem minor but, for a mouse, they form a perfectly usable corridor. A tenant in a triplex on Lajeunesse Street who finds droppings under the sink in April probably has a gap in a basement window frame dating from the previous fall.
A methodical inspection covers: the perimeter silicone of each window (look for bubbles or peeling), door-bottom weatherstripping (slide a sheet of paper under it — if it passes through easily, the seal is inadequate), Internet and electrical cable entries, and dryer vents. The latter are often overlooked: a vent whose flap is broken or stuck open by scale becomes a direct entry into the boiler room or the laundry room.
Responsibilities in Quebec: under the Civil Code and the case law of the Tribunal administratif du logement (TAL), the landlord must keep the dwelling free of pests and correct the structural deficiencies that allow intrusions. A tenant who documents an unsealed gap after a written notice has real recourse.
Should you call a professional exterminator or do it yourself for the post-winter inspection and treatment ?
Much of the post-winter inspection can be done yourself for the visible exterior points — foundation, eaves, windows — but treating an established infestation almost always requires a certified professional. The distinction comes down to one simple criterion: if you find active signs (frass, droppings, live pests, recent damage to wood), calling an exterminator is no longer an option but a necessity.
Handy homeowners can take care of the following on their own: preventive sealing of cracks, replacing weatherstripping, cutting branches close to the roof and installing mesh over ventilation openings. This mechanical prevention work is extremely effective and requires no pesticide. However, as soon as a carpenter ant colony is suspected in the walls, or a rodent has established a regular trail in the basement, a MELCCFP-certified technician is required: only they can use commercial-class rodenticide baits and insecticide gels safely and in compliance with Quebec regulations.
An exterminator will also map the entry points that an untrained eye consistently misses: a 6 mm hole behind a heating pipe, a crack hidden by vegetation on the front of the house, a foundation vent with a gnawed grille. This map becomes your priority sealing plan for the summer.
And in the neighboring neighborhoods?
- Saint-Laurent — a mixed industrial and residential area where warehouses next to triplexes increase rodent pressure in spring.
- Villeray — dense rental stock of 1950s duplexes and triplexes, particularly exposed to carpenter ants after winter.
- Montréal-Nord — an area with a high proportion of 1960s–1970s bungalows whose aging wooden soffits deserve an inspection every spring.